
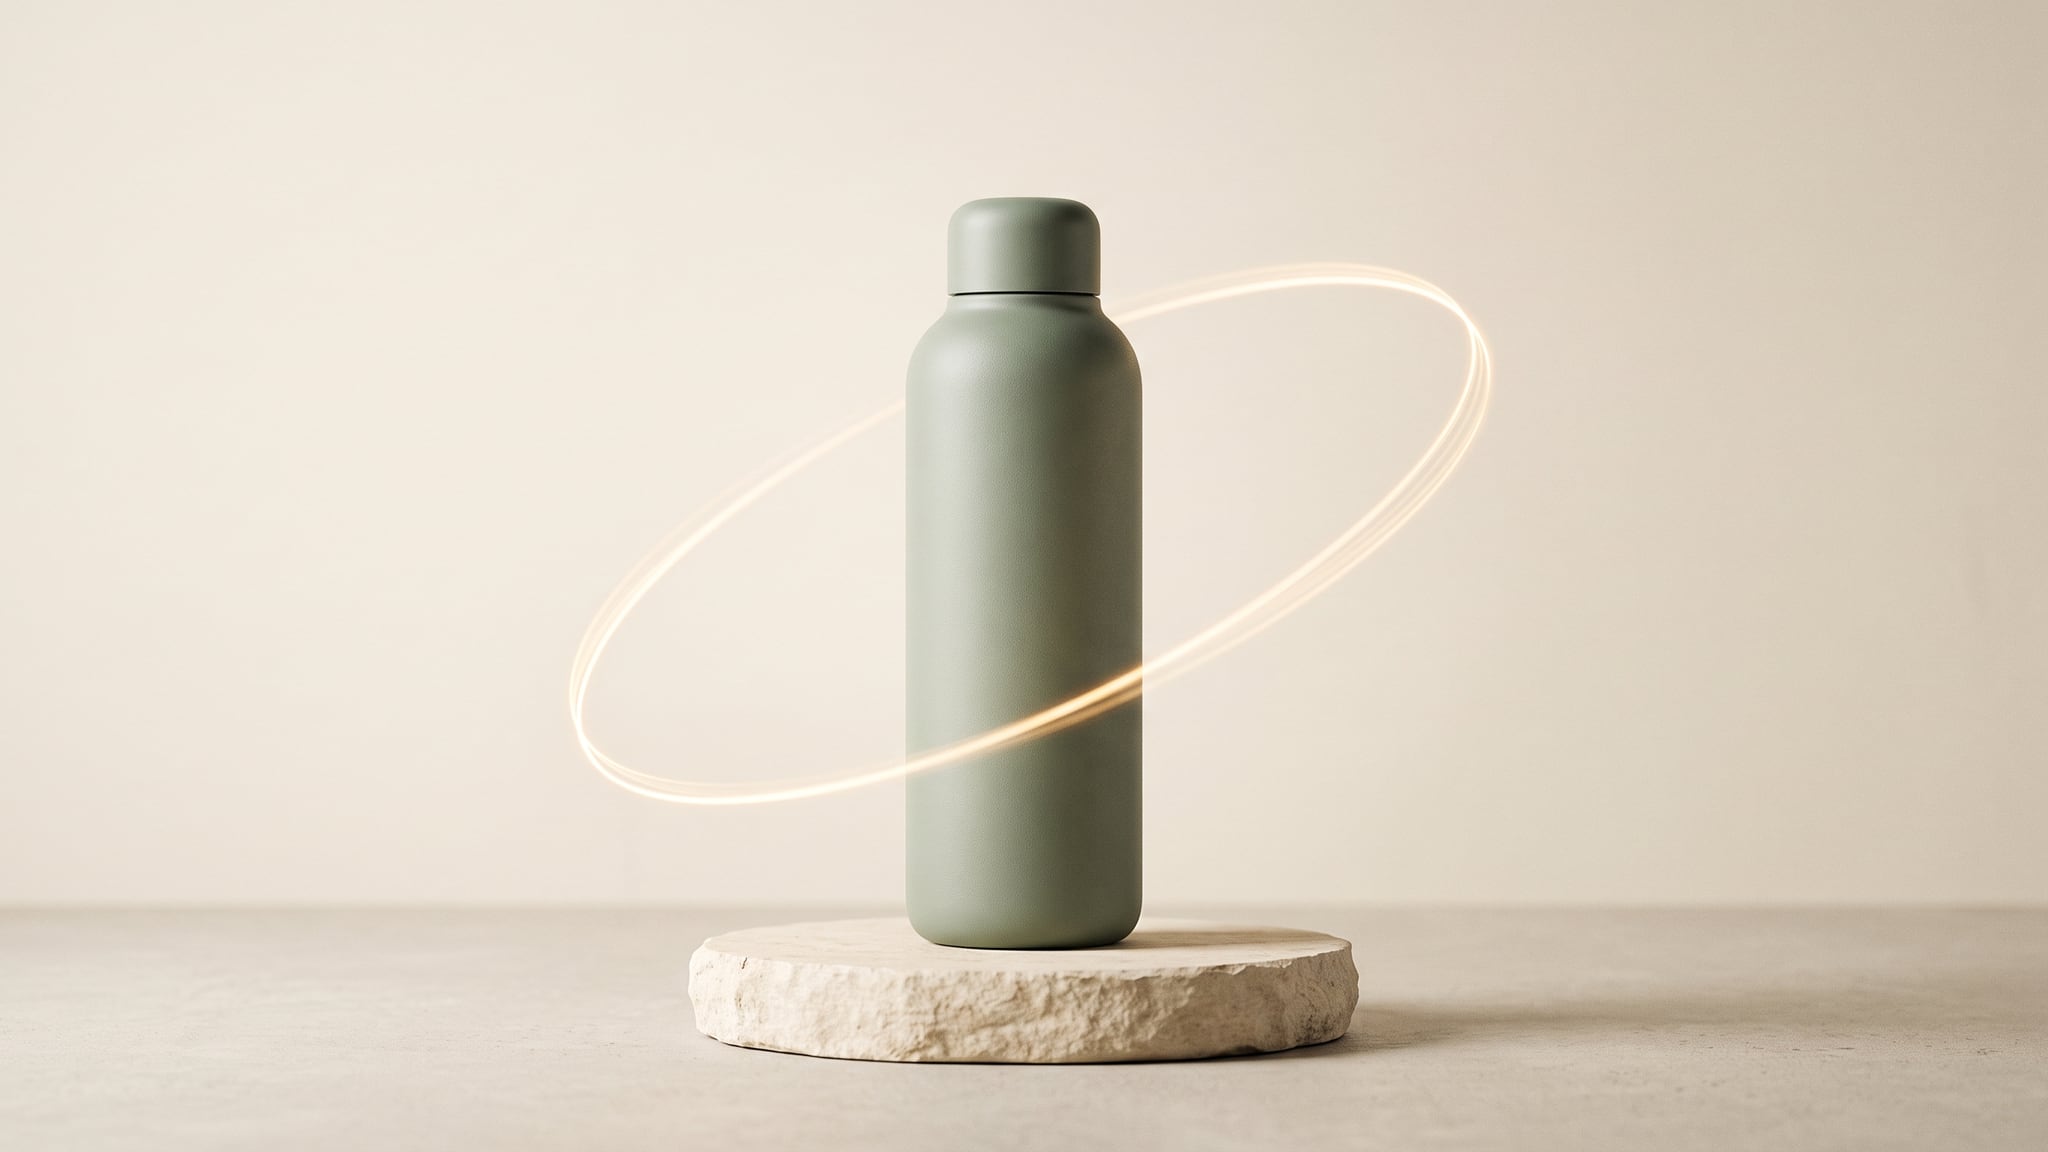
The bottle drifts beautifully for five seconds, then jumps back to its starting position. Learning how to make seamless AI product video loops means solving that restart: the moment when the last frame hands the scene back to the first. A convincing clip can still make an awkward loop.
The practical route is to plan repeatable motion, generate a usable source clip, and construct the repeat in an external video editor. This guide uses a hypothetical sage-green bottle to compare three approaches: a natural motion cycle, a forward-and-reverse edit, and an overlap crossfade. Oxava handles source-clip generation in this workflow; the trimming, reversing, transitions, and final export happen in your editor.
What makes a product video loop feel seamless?
Check the join at three levels:
- Position: Does the product return to a compatible size, angle, and place in the frame?
- Motion: Does its direction and speed continue naturally through the restart?
- Appearance: Do the color, lighting, shadow, background, and visible product details remain consistent?
Matching two still frames addresses only part of the problem. Imagine a bottle reaching the center while moving right, then restarting at the center while moving left. The position matches, but the sudden reversal still catches your eye. A highlight can also jump across an otherwise stationary bottle.
Treat the final-to-first transition as another edit point. Watch the surrounding motion, not just a side-by-side comparison of the endpoints. Your target is a repeat that stays unobtrusive at normal speed while keeping the product truthful throughout.
If you need a vocabulary for camera direction and pacing first, our cinematic AI video prompting guide explains those building blocks. Here, every decision serves the restart.
Choose a loop method before generating
The motion you request should fit the editing method you expect to use. These are practical starting choices, not guarantees about generated results.
| Method | Good starting material | Main advantage | Reason to reject it |
|---|---|---|---|
| Natural cycle | A gentle movement that returns to its starting state | Preserves forward motion throughout | The return misses its position, speed, or lighting |
| Forward and reverse | A small, controlled movement with gentle endpoints | Reuses the same frames on the return journey | The direction change feels abrupt or the action looks wrong backward |
| Overlap crossfade | A nearly fixed composition with modest visual differences | Blends the reset across several frames | Bottle edges, labels, or shadows appear doubled |
For a first attempt, choose a stationary product with one restrained moving element, such as a soft highlight. A full camera orbit creates more views to verify; a one-way push-in ends at a different scale; a pour introduces an action that looks unusual in reverse. Save those ideas for a brief that genuinely needs them.
A complete product-ad sequence also has different needs from a continuously repeating hero shot. If you need an introduction, demonstration, and closing message, use our AI product-video storyboard workflow to plan the sequence first.
Plan the sage-green bottle example
Our example is a fictional, unbranded bottle with a matte sage-green body, rounded shoulders, a short rounded sage-green cap, and no visible writing. It stands upright on a warm neutral surface. The goal is a quiet product loop that shows its silhouette clearly.
1. Approve the still before requesting motion
Use a clear photograph for a real product. Check the cap, proportions, color, and any label against the actual item before proceeding. For this fictional bottle, approve one reference image and keep it as the visual standard.
Leave a little room around the silhouette and choose the delivery orientation early. Keep props minimal so you can spot changes easily. Our product-photo-to-video guide covers the broader source-image preparation process.
Write a short acceptance note beside the reference: “One upright bottle; unchanged shoulder shape and cap; consistent sage-green finish; stable surface and background.” With a real product, include every visible feature that matters to an accurate presentation. A smooth restart cannot compensate for altered packaging.
2. Specify one repeatable action
For this example, choose a broad, faint highlight that travels a short distance across the bottle and returns. Keep the camera and bottle fixed. This gives the loop a visible rhythm without requiring an invented view of the product's back.
Sketch three states: highlight at its starting position, highlight at the farthest point, highlight back at its starting position. Decide whether the return will be generated or created by reversing a selected segment in the editor. You do not need both approaches in the same prompt.
3. Generate source footage with room to trim
Open the Oxava studio, use your approved product image with an available image-to-video model, and request the selected motion. Choose from the duration and format controls actually offered by that model. Generate source footage with enough usable movement to select a clean section later.
Keep the first attempt simple. After reviewing it, change one issue at a time: reduce highlight travel, reinforce the fixed camera, or replace an unsuitable reference. Save the prompt alongside the take so a revision has a clear starting point.
AI video loop prompts: three starting templates
Runway's image-to-video prompting guide distinguishes the image's visual information from the text's job of directing motion, camera behavior, and timing. Its model-specific guidance does not guarantee identical behavior elsewhere. For our workflow, the useful principle is to describe the intended movement clearly and inspect what actually happens.
The following prompts are untested starting templates. They request a result; they do not activate a dedicated loop control or promise frame-perfect output.
Option A: request a complete cycle
Locked camera on the bottle. A broad, faint studio highlight travels slowly from the left shoulder toward the center, then gently returns along the same short path. Complete one calm cycle, returning to the initial lighting state. The bottle remains upright and stationary, with the same silhouette, cap, color, and surface texture throughout. Keep the background steady.
Look for a gradual turnaround and a return that reaches the starting state without a final snap. If the generated cycle comes close but overshoots, select a cleaner cycle from within the footage rather than automatically keeping the full clip.
Option B: generate one leg for a reverse edit
Static camera. A soft highlight moves a small distance across the stationary bottle, beginning gently and slowing toward the end. Keep the movement restrained and the bottle's shape, cap, color, and background unchanged. One continuous product shot.
This requests only the outward movement. You will create the return in the editor. Judge whether the beginning and end are gentle enough to become convincing turning points.
Option C: prepare a nearly static crossfade source
Locked product composition. The bottle remains still while a very subtle, broad lighting variation passes across its matte surface. Keep the silhouette, cap, exposure, and background stable. Restrained motion with a consistent product view throughout the shot.
Here the priority is compatible imagery for a blend. Reject a take that changes the bottle's position or proportions, even if the lighting looks attractive. Crossfading two different silhouettes will expose both.
Build seamless AI product video loops in an external editor
Import the chosen take and first remove unusable frames. Then choose one construction method. Keep a copy of the untouched source so you can revise the edit without generating again.
Method 1: trim a natural cycle
Find a point where the motion reaches a recognizable state, then locate its next equivalent state. For the bottle, that might be the same highlight position traveling in the same direction. Use those points to define the cycle.
Place two copies of the trimmed section back to back. Watch the join at normal speed, then step through the nearby frames. Adjust the cut if there is a jump or an extra hold. Where the closing frame duplicates the opening frame, avoid including that same moment twice at the restart.
Keep the original product check active: a highlight returning neatly does not excuse a cap that changes shape halfway through. If there is no clean cycle, choose a different method or generate another take.
Method 2: append a reversed copy
Select a clean movement, duplicate it, reverse the duplicate, and place it immediately after the forward segment. In Premiere, Adobe documents Reverse speed in the Speed/Duration controls. Use your editor's equivalent operation if you work elsewhere.
Check both turning points: forward into reverse, and reverse back into forward when the exported file repeats. Remove duplicate endpoint frames if they introduce a visible pause. Do not remove an intentional gentle hold just because a repeated frame exists; judge the rhythm in playback.
This construction retraces the same imagery, but an immediate reversal can still feel mechanical. Favor footage that slows near each endpoint. For our bottle, a short highlight sweep is a reasonable candidate. Rising steam that suddenly flows downward, liquid returning to a spout, or hands undoing a natural gesture can make the reversal obvious.
Keep audio separate from this operation. Reversing picture does not make backward speech, music, or product sounds appropriate for the return journey.
Method 3: hide the reset inside an overlap crossfade
Use this when the composition stays stable but the source's beginning and end do not join cleanly. Adobe's dissolve-transition reference describes Cross Dissolve as fading one clip out while another fades in. The construction below applies that blending idea to a repeat.
- Split the clean source near its middle. Call the earlier section A and the later section B.
- Place B first and A second. The original end now meets the original beginning inside the timeline.
- Overlap B's tail with A's head on separate video tracks. Start with a short overlap and adjust by watching the result.
- Blend across the overlap. Keep B opaque on the lower track and fade A from transparent to fully visible on the upper track. Continue A alone after B ends.
- Export from B's beginning to A's end. Preserve the original split points at those outer boundaries, without adding a hold or fade to black.
Why reorder the halves? At the exported file's restart, A's last frame leads into B's first frame, which were adjacent in the original source. The difficult original end-to-start reset is now the blend inside the clip.
For example, split a six-second source at three seconds, then overlap the reordered halves by half a second. The resulting timeline is five and a half seconds long. Those numbers illustrate the edit; they are not required generation settings or a universal crossfade duration.
Inspect the overlap for doubled shoulders, a ghost cap, or a brightness pulse. A longer dissolve can make those defects more conspicuous. If you use a transition effect instead of overlapping tracks, check its footage requirements: Adobe's transition overview advises trimming first to leave frames available for the transition.
Inspect the restart and protect product integrity
Put three copies of the finished cycle next to each other in the editor. This makes the repeat points easy to inspect without relying on a player's restart behavior. Alternatively, Premiere's continuous-playback controls repeat a section between In and Out points. Enabling repeated playback does not repair the edit. Configure repeat playback separately in the destination player. Use three review passes:
- Normal-speed pass: Watch without sound. Notice any jump, pause, sudden reversal, exposure pulse, or distracting rhythm.
- Frame-detail pass: Examine the joins and the middle of the cycle. Check the cap, shoulder outline, base, label, material texture, shadow, and object count against the approved source.
- Delivery pass: Export the actual file, inspect it at its intended display size, and preview it in the destination player when possible.
If the join jumps, compare position and scale. If the silhouette doubles, reduce the dissolve or choose a more stable take. If motion bounces harshly, revisit the forward/reverse turning points. If the product itself changes, replace or shorten the affected footage instead of hiding it behind a transition.
Add exact headlines or calls to action as editor text. Decide whether that text stays visible throughout the repeat or has its own carefully checked entrance and exit. Review audio separately for abrupt cuts and distracting repetition; use a silent export when sound is unnecessary.
For a website placement, plan viewer controls too. W3C's explanation of WCAG 2.2.2 calls for a way to pause, stop, or hide nonessential moving information when it starts automatically, continues for more than five seconds, and appears alongside other content. A short clip repeated indefinitely still creates ongoing movement. Check the actual page's playback behavior as well as the exported video.
Keep the approved source image, selected take, editable timeline, and final export together. That makes a later crop or text revision easier to trace back to the version you checked.
Frequently Asked Questions
Can an AI video generator make a seamless loop automatically?
A prompt can request a returning motion, but the output still needs inspection. This workflow uses Oxava to generate source clips and an external editor to construct and verify the repeat. Use only the controls your selected model actually exposes.
Is using the same first and last frame enough?
Matching images can help align appearance where a tool supports those inputs, but movement around the join still matters. Check direction, speed, lighting, and any pause at the restart. An identical endpoint does not by itself establish smooth motion.
When should I use a reverse loop instead of a crossfade?
Try reverse when the action looks reasonable in both directions and slows near its turning points. Try a crossfade when the product composition stays almost fixed and the reset can blend without double edges. Reject either method if it compromises the product's appearance.
How long should a seamless product loop be?
Choose enough time for one readable motion cycle and the intended placement. There is no universal duration that fixes a seam. The edited loop may be shorter than the source after trimming or overlap, or longer after adding a reversed segment.
Can I loop a product video with a visible logo or label?
Yes, provided the visible branding remains accurate throughout the selected footage and the transition. Inspect lettering and label edges during motion and any blend, not only in the first frame. If important details distort, select a different take or use a less ambitious movement.
Make the restart part of the brief
Seamless AI product video loops start with a truthful reference and a movement that can repeat. Choose the construction method early, inspect the product through the whole cycle, and judge the exported file across several restarts.
Create your source product clip in Oxava, then bring the selected take into your editor. Start with one restrained movement and keep the version whose restart feels as considered as its first frame.
Oxava Team
Egemen Küpçü is the founder of Oxava, with 10+ years of hands-on experience in 3D and visual production. He writes about the craft of generating product, brand and campaign visuals with AI.
Related Articles
ALL POSTS
Subscribe to our newsletter
Be the first to hear about new techniques, model updates and ideas on AI generation.