
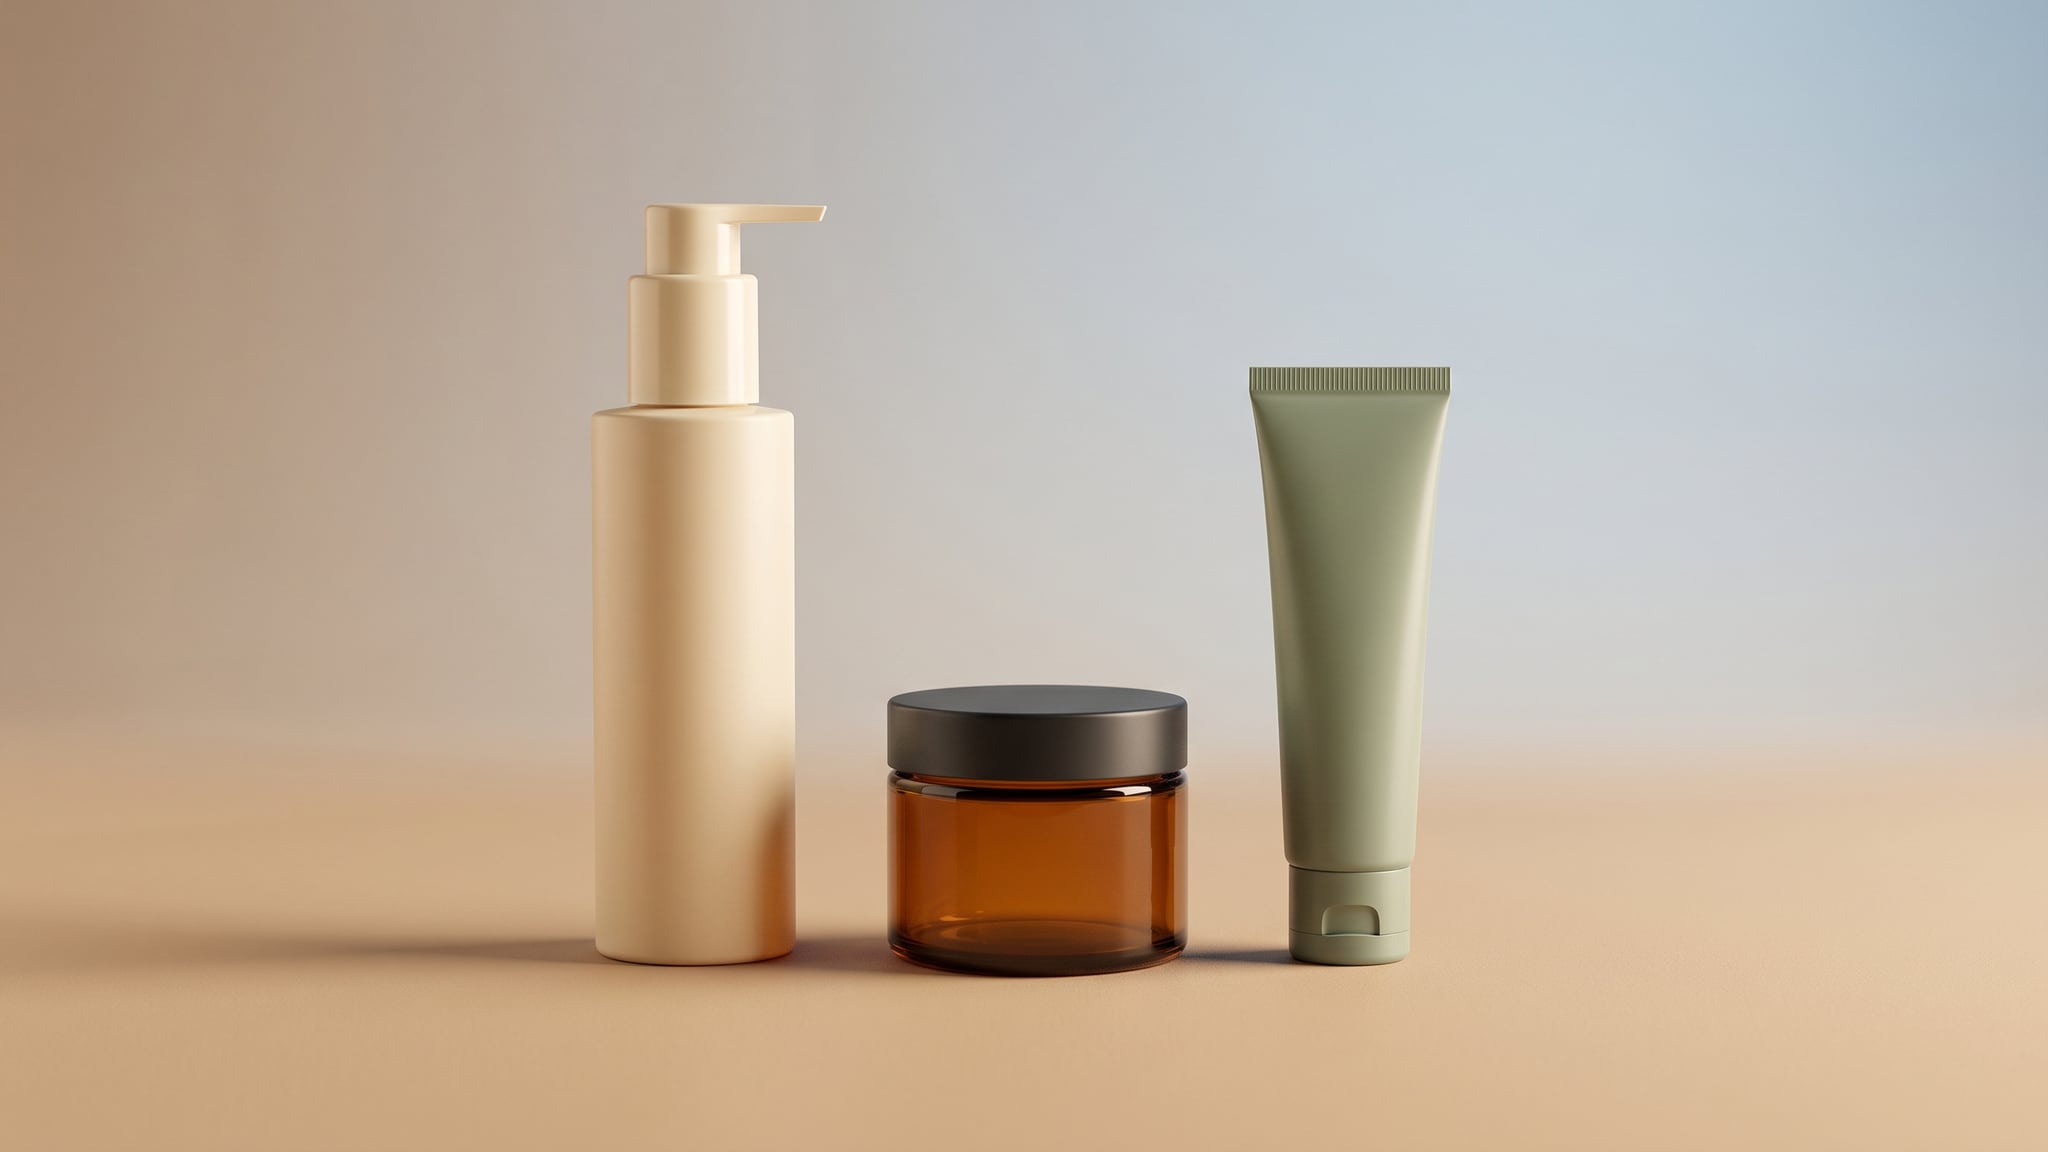
A beautiful set image can still show the wrong purchase: an extra jar, a missing tube, or a gift box that never ships. AI product bundle photography starts with a more useful question than “Does this look premium?” Can a shopper identify every included item, in the right quantity, without guessing?
This guide gives you a reference-led workflow for that job. You will choose an input route, map each product to its source, build a simple composition, and approve its contents before changing the setting. Our broader AI product photography guide covers the foundations; here, the focus is several distinct objects sharing one frame.
Define the exact set before generating
Write down what the customer receives for the selected offer. Distinguish three situations:
- A mixed set: different products sold together, such as a bottle, tube, and jar.
- An identical-unit multipack: repeated units of the same product, such as three matching bottles.
- A range of alternatives: several colors or sizes shown together, although the customer selects only one.
Those pictures may look similar, but they communicate different purchases. For alternatives, do not present the whole range as the included contents. For identical units, check the repeat count and whether every unit has the same design. For a mixed set, each object's identity needs its own check.
Consider a fictional three-product skincare set. This is a planning example, not a real merchant case study or a tested generation.
| Component | Sale-unit count | Identifying detail | Example reference file | Must remain visible |
|---|---|---|---|---|
| Pump bottle | 1 | Ivory body, assembled pump | bottle-front.jpg | Bottle outline and pump |
| Squeeze tube | 1 | Sage body, attached closed cap | tube-front.jpg | Tube shoulders and cap |
| Short jar | 1 | Amber body, closed charcoal screw lid | jar-front.jpg | Jar body and lid boundary |
The pump, cap, and lid belong to those three sale units. They are not extra products to scatter beside them. No gift box, ribbon, scoop, towel, flowers, or fourth container belongs in this base contents image.
Record packaging and styling props on separate lines in your working notes. Mark each as included in this offer, available only with another offer, or excluded. If a box is available only with a different offer, it needs a different image brief. This small inventory prevents a creative instruction such as “gift-ready presentation” from silently changing the purchase.
Choose a reference route for AI product bundle photography
Your starting material determines what you can reasonably ask the model to compose. Use this decision table before writing the scene prompt.
| Route | Choose it when | Main risk | Approval check |
|---|---|---|---|
| Real group photograph | You can photograph the actual set together | Generation changes a product that was already correct | Compare every item with the original group |
| Separate product references | Each item has a clear, compatible source photo | Attributes swap or perspectives conflict | Match each output object to its assigned source |
| External layered composite | Merchandise detail must remain under direct editing control | Cutouts look disconnected or misleadingly scaled | Inspect original product layers and their arrangement |
Start with a group photo when possible
A real group photograph records which objects coexist, how they relate, and what the arrangement actually looks like. Keep silhouettes separate and choose a view where the smallest item remains recognizable. A modest source photograph can be useful even if the background needs work.
The model still generates a new interpretation. A group reference does not protect the products from change, so retain the original beside every candidate. If the original already answers the listing's question clearly, using that photograph may be the right release decision.
Use separate references with explicit assignments
Separate files are useful when the products were photographed individually. Choose compatible views: a front-facing tube and bottle are easier to brief coherently than a top-down jar beside an eye-level bottle. If the desired composition reveals an unseen side, photograph that side first.
Google's image-generation documentation describes composing a new scene from multiple input images by specifying which element comes from each. Apply that principle with one product assignment per source. It supports a composition technique, not a promise of unchanged merchandise.
Check proportions separately. Cropped files can make a small jar and a tall bottle occupy similar image areas. Use a real group reference or verified measurements to judge their relationship; our product scale and size accuracy guide covers that check.
Choose an external composite for controlled product layers
When exact photographed details must survive, assemble actual product cutouts in an external image editor. Keep the merchandise on separate layers and build the background around them. Match placement, perspective, and shadows without asking generation to redraw the products.
That is a separate editing route from reference-based generation in Oxava. Sending the assembled composite through another generative pass can change its products again. Review the final file, including any resizing or retouching, rather than assuming layered work automatically makes the whole image accurate.
Build one countable composition in Oxava
Open the Oxava studio and select an image model that supports references and is available to your account. Attach the group photograph or the individual files your selected model supports. If you use reference names, our named image references guide explains the interface; the important work here is assigning each source to the correct object.
1. Make a source-to-object map
For the fictional set, the map is simple: the bottle file supplies the bottle, the tube file supplies the tube, and the jar file supplies the jar. Each contributes its own shape, color, closure, and visible markings. A source showing a second product in the background needs clarification or a cleaner replacement.
Do not ask the model to unify the products' design language. They may intentionally have different colors and materials. Instead, unify the environment: one surface, one light direction, and compatible contact shadows.
2. Generate the contents view first
The following are untested starting prompts, written for this hypothetical set. Adapt them to the actual views and contents in your photographs. Words such as “retain” express requested constraints; they are not product-lock controls.
Starting prompt A: a real group photograph
Use the attached group photograph as the source for this three-product set. Show exactly one ivory pump bottle, one sage squeeze tube, and one short amber jar with its charcoal lid closed. Retain their observed left-to-right order, visible faces, closures, and relative proportions. Present the set on a plain warm-white surface with soft, even light. Keep clear space between silhouettes. Include only these three sale units, with all closures attached. No additional containers, packaging, or decorative objects.
Use this when the source already has a workable arrangement. Asking for a dramatic new camera angle would discard some of the evidence that makes this route useful.
Starting prompt B: separate product references
Compose one set image from the three attached product photographs. Use the bottle photo only for the ivory pump bottle, the tube photo only for the sage tube with its cap attached, and the jar photo only for the short amber jar with its closed charcoal lid. Show one of each: bottle left, jar center, tube right. Use the front-facing views documented in the inputs, on one plain surface with soft daylight. Keep each complete silhouette readable and separate. Keep each product's own color and closure; do not exchange their attributes. Add no other objects.
This is a layout request. It does not establish true physical proportions from independently cropped photos. Compare the output with your group reference or size notes before approving it.
3. Review the products before the styling
Count the sale units first. Then inspect one object at a time, following the inventory order. Finally, inspect the whole arrangement for overlaps and misleading emphasis. This sequence gives the small jar as much attention as the tall bottle.
When a candidate fails, identify the failed requirement before changing the prompt. A hidden jar calls for spacing or arrangement changes. A tube that takes on the bottle's ivory color calls for clearer reference assignment or better inputs. If repeated attempts cannot represent the merchandise truthfully, return to real photography or the external composite route.
Keep the approved candidate, its source files, and the inventory together. An attractive intermediate image should not replace the original photographs as the authority on what you sell.
Give contents, packaging, and lifestyle views separate jobs
Shopify's product photography guide distinguishes group images, useful for bundles and collections, from packaging images that communicate the presentation experience. Use that distinction to plan a small, purposeful image set.
Contents view: all included products are easy to identify and count. For the fictional set, this remains three closed products on a plain surface.
Packaging view: show the actual included packaging from real source material. Etsy's photo-type guidance explains how packaging photos establish expectations about what arrives. That is photography advice, not blanket approval of AI-generated Etsy listing images. If the skincare set has no gift box, skip this view rather than inventing one.
Lifestyle view: place a reviewed arrangement in a restrained setting. Keep the contents legible even when the background becomes more expressive. Our lifestyle product images guide explores scene planning in more depth.
Starting prompt C: a restrained lifestyle adaptation
Use the reviewed three-product composition as the arrangement reference. Place the same bottle, tube, and closed jar on an uncluttered pale stone bathroom counter. Keep their order, separate outlines, visible faces, and individual colors. Introduce soft window light and a quiet wall behind them. Keep all three products fully inside the frame. Add no toiletries, accessories, gift packaging, or loose closures.
Review this new output against the original product photographs as well as the approved composition. Approval belongs to the specific image you inspected. It does not carry over automatically to a generated variation.
Check every component before release
Use two viewing sizes: a close inspection for product detail and the intended small display size for readability. A jar can be technically present yet almost disappear in a thumbnail.
| Check | Question to answer |
|---|---|
| Quantity | Is every required sale unit present exactly as many times as specified? |
| Identity | Does each object match its own source in shape, color, closure, and visible markings? |
| Visibility | Can shoppers distinguish each silhouette and recognize the smallest item? |
| Configuration | Are caps, pumps, lids, and included packaging in the documented state? |
| Proportions | Does the arrangement agree with the real group or verified size notes? |
| Added objects | Could any extra object be mistaken for something included? |
| Destination | Does this particular image suit the intended listing slot and its rules? |
A hypothetical review record could read:
- Reject: the tube has adopted the bottle's ivory color.
- Reject: the jar is hidden behind the bottle and cannot be identified.
- Rework: all products are correct, but tight spacing makes two silhouettes merge at mobile size.
- Pass for contents review: three recognizable products match their individual sources, with clear spacing and no extras. Destination checks remain.
- Fallback: use the real group photograph when generated candidates cannot keep the merchandise truthful.
These are decision examples, not reported results from an Oxava test. Record the offer or SKU, image filename, review date, and specific reason for each decision. If the offer's contents or the image changes, review it again rather than carrying over the old approval.
Keep Google Merchant Center distinctions precise
For Google Merchant Center, everyday language such as “gift set” does not automatically mean is_bundle=yes. Google's bundle definition concerns a retailer-created combination with a main product and different complementary products; manufacturer-created bundles are treated differently. Its hat-and-scarf set example uses is_bundle=no. Our fictional skincare example does not establish a feed classification.
Google's multipack attribute concerns identical products grouped by the retailer. It counts the manufacturer-defined packages grouped together, which may differ from the number of physical pieces inside. A manufacturer-created pack is treated separately.
Image examples also differ. Google's additional-image guidance shows all components in a bundle's main image and only the camera body in an additional image. Its multipack example shows one soap bar in the main image and three in an additional image. Do not turn a useful full-contents view into a universal rule that every multipack main image must show every unit.
Google's main-image requirements call for the actual offered product, exclude unsold extra products and promotional overlays, and require generative-AI source metadata. Check those destination-specific rules before submission. For file preparation and metadata review, continue with our product image export guide.
Frequently Asked Questions
Can I combine separate product photos into one AI bundle image?
Yes, with a model that supports the required references. Assign each source to one object and use compatible photographed views. Check the resulting identities and proportions against real evidence before treating it as a product image.
Why does the item count change even when my prompt specifies it?
A requested count does not enforce a verified inventory. Generation can add, merge, or omit objects, so use a simple arrangement and count the output yourself. Separate included products from closures, packaging, and props in the brief.
Is every gift set a bundle in Google Merchant Center?
No. Google's definition distinguishes retailer-created bundles with a main product from other sets and manufacturer-created combinations. Use the linked official attribute guidance for your actual offer rather than inferring a classification from its marketing name.
Can I add a gift box that is not included?
Keep it out of the contents image. It can create the impression that the customer receives packaging that is not part of the purchase. Any separate promotional scene needs clear context and a destination-specific rules check.
Can a prompt preserve all product details exactly?
No prompt should be treated as a pixel-preservation guarantee. Compare generated merchandise with the originals, including visible branding and closures. Use real photography or an external editor with controlled product layers when exact detail is essential.
Approve the set before exploring the scene
Good AI product bundle photography makes the purchase clear: the right products, the right quantities, and enough separation to recognize them. Start with factual references, approve one simple composition, and review each variation on its own merits.
Open the Oxava studio, attach a real group photo or supported individual product references, and build a countable contents view before exploring a lifestyle setting.
Oxava Team
Egemen Küpçü is the founder of Oxava, with 10+ years of hands-on experience in 3D and visual production. He writes about the craft of generating product, brand and campaign visuals with AI.
Related Articles
ALL POSTS
Subscribe to our newsletter
Be the first to hear about new techniques, model updates and ideas on AI generation.