
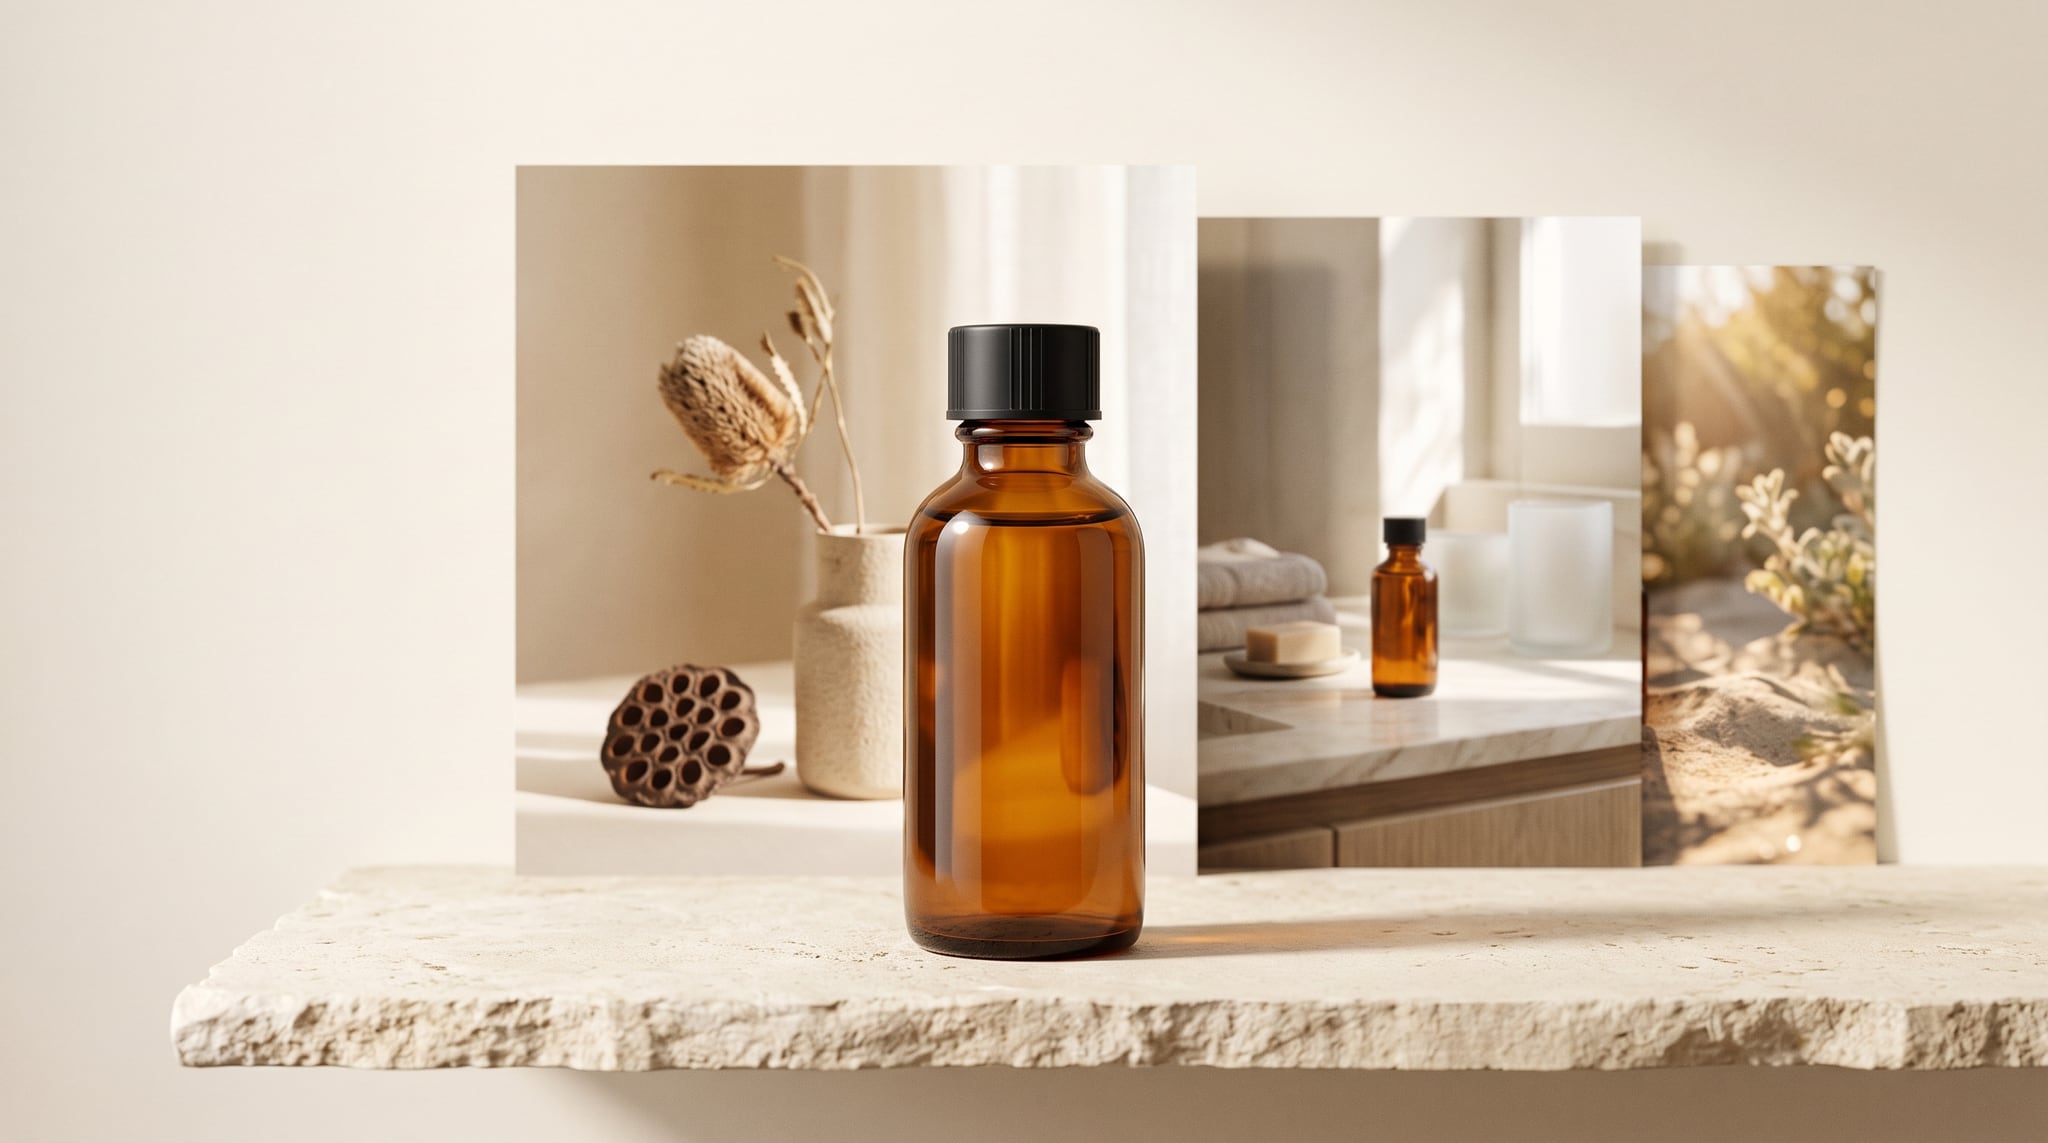
You have a product photo that looks right. Now you need the same bottle on a bathroom shelf, in a campaign still, and in a short video. Repeating its color and shape in every prompt leaves too much to chance. How to use named reference images in AI is a more practical question: which image should carry each detail, how do you call it by name, and when should you save a result for the next job?
In Oxava, you can name an attached reference in Image Composer and mention it as @name in your prompt. You can also save a successful gallery image to your account's reference library and mention its name in a later image project or a supported video workflow. This guide walks through the whole path, including what a named reference can guide, what it cannot guarantee, and a copyable three-scene product example.
What a named reference does
A named reference joins an image to a role in your prompt. Instead of asking for “the bottle from the first image,” you can name its image amber_bottle and write, “Place @amber_bottle on a limestone shelf.” The name makes your instruction easier to read when several images are in play. It also makes it easier to reuse a visual idea later without rewriting a long physical description.
Think of three common roles:
| Reference role | Good source image | What to say in the prompt |
|---|---|---|
| Subject or product | Clear view of the item you want to carry forward | “Use @amber_bottle as the product; keep its amber glass and black cap.” |
| Scene or composition | A location image or a strong layout | “Place the product in the window-side setting of @stone_shelf.” |
| Style or mood | An image with the lighting, palette, or texture you want | “Use @soft_daylight for the warm, diffuse light, not for its objects.” |
That distinction matters. Adobe's style-reference guidance uses images to guide look and feel. Runway's image-reference guidance also covers characters, objects, and locations. Together, they suggest a useful rule: tell the model which property to borrow from each image.
A reference is guidance, not a pixel-perfect lock. Lettering, proportions, and facial details can change. Inspect the output when a real product, logo, or person must remain recognizable. For broader prompt basics, see our AI image prompt guide.
How to use named reference images in AI Composer
Start in the Oxava studio with an image model that accepts references. Reference limits depend on the selected model, and some models do not accept reference images. The Composer shows the selected model's limit, so check that before assembling a large set. A short, purposeful selection usually gives you a clearer prompt than a pile of near-duplicates.
- Add a clear source image to Image Composer. For a product, choose a view that exposes its silhouette, label position, and main color. Avoid a tiny, blurry crop where the identifying details are hidden.
- Use Name reference on the attached image and give it a specific name, such as
amber_bottle. The name can be up to 32 characters, must start with a letter, and can contain letters, numbers, and underscores. Spaces are not allowed. - Mention that name in your prompt with
@: “A quiet bathroom shelf scene featuring@amber_bottle.” Add the role you want the image to play, such as “preserve the bottle shape” or “use only the lighting.” - Generate, then compare the output with the source. If the bottle changes, narrow the request before adding more instructions: ask for one camera angle and one setting, and state the crucial product details plainly.
Names are case-insensitive: @Amber_Bottle and @amber_bottle resolve to the same reference. Two local cards cannot share that name. The image must be attached, and the prompt must explain its job.
Weak prompt: “Make this look premium, with the same bottle and nice light.”
Stronger prompt: “Use @amber_bottle as the central product. Keep the short amber-glass cylinder, flat black cap, and cream label placement. Put it on a pale limestone shelf at a three-quarter angle. Soft window light from camera left; uncluttered warm-gray background.”
The stronger version gives the reference a role and lists details to check. To change a finished image while preserving most of its layout, try an image-to-image editing workflow.
Give each image one job when you combine references
Multiple references can supply a product and its atmosphere, but unclear roles invite blended products or unwanted props.
Before generating, write a one-line job description for every image you attach:
@amber_bottle: the product's shape, color, cap, and label placement.@stone_shelf: the shelf material and open space around the product.@soft_daylight: the lighting direction and gentle contrast only.
Then make the prompt match those jobs: “Use @amber_bottle for the product, the pale limestone and framing of @stone_shelf for the setting, and the window-light mood of @soft_daylight for illumination. Show one bottle. Keep the background free of the other objects in the references.”
Models may still mix those attributes. If an output does, reduce the active references and generate the subject first. Add the location or style next. Runway's examples also show how a strong intermediate result can become your next reference.
You can use the same method for a recurring character: name a neutral, clear portrait for identity, then use a separate scene image for composition. If that is your main goal, our character consistency guide goes deeper into choosing useful source images and reviewing identity across scenes.
Save a winning gallery image for later reuse
A local reference serves the current composition. A saved reference serves later sessions. When a generation nails a useful angle or design, save it from the gallery menu with a recognizable name, such as amber_hero.
This creates a simple progression:
- Start with a real product image named
amber_bottlein the current Composer. - Generate a clean hero frame with the bottle on limestone.
- Inspect the result. If it is worth carrying forward, use Add reference on that gallery image and save it as
amber_hero. - In a later image prompt, write
@amber_heroand describe the new location or angle. Oxava resolves the saved name from your account's reference library when you use it.
Choose a saved image with a clean silhouette and accurate key details. A weak image can pass mistakes into later scenes. You can rename or remove its reference name without erasing the gallery image.
Keep names distinct across your working set. If a local reference card and a saved library reference share a name, the local card takes priority. For example, a local amber_hero can shadow the saved amber_hero, even if you intended the gallery image. Rename one before generating. This is especially important when you revisit a draft and assume a familiar @name still points to the same visual.
Turn the selected still into a supported video shot
The strongest still in a campaign can also become the starting image for motion. In Oxava's video workflow, Kling v3 Standard in Image to Video supports named references. Choose a start image first, then add or use named references and mention the relevant @name in the prompt. The named-reference path is specific to this supported mode; do not assume every video model or Kling mode uses it.
There are two image roles here. The start image establishes the opening frame's subject, composition, and visual style. A named reference can point the prompt toward an additional subject or visual element. If the product is already clearly present in the start image, you may only need that starting frame and a motion instruction. If another named image is useful, give it an explicit task rather than attaching it without a mention.
The image-to-video prompting guide from Runway recommends describing action and camera movement, since the input image already carries the visible scene. Try: “The camera slowly moves toward the bottle as window reflections travel across the glass. Keep the bottle upright.” That is easier to judge than a long description of static details.
Check the start image first. Distorted labels or awkward edges can become more noticeable in motion. Preview the clip for shape shifts, extra objects, and text changes. Simplify the action if the product drifts.
A three-scene product campaign you can copy
Suppose you sell a small amber skincare bottle. You have one straightforward product photo and need three related assets: a hero still, a lifestyle still, and a short motion clip. The following prompts are a working template, not a promise that every model will produce the same result. Replace the reference names and visible product details with your own.
Scene 1: establish the product
Attach the original product photo in Image Composer, name it amber_bottle, and generate a clean hero view. Keep the first request focused on shape and legibility.
Use
@amber_bottleas the only product. A short amber-glass skincare bottle with a flat black cap and a cream label, standing upright on pale limestone. Three-quarter view, soft side light from a nearby window, subtle shadow, calm warm-gray background. Leave generous clear space around the bottle. No hands or extra packaging.
Compare the output with the real photo. Is the cap the right shape? Is the label where it belongs? Is there one bottle? If the hero frame passes those checks, save it from the gallery as amber_hero.
Scene 2: change the setting, keep the visual anchor
In a later image session, mention your saved @amber_hero. Add a local setting reference only if the shelf and light are hard to describe in words. If you attach one, name it bathroom_shelf and state that it contributes the scene, not another product.
Place
@amber_heroon the pale stone counter from@bathroom_shelf. Keep the bottle's amber glass, cap, label placement, and upright stance. Morning window light; a folded neutral towel sits out of focus in the background. Frame the bottle as the clear focal point, with room for a headline on the right. Do not import other bottles from the setting image.
If you do not have a setting image, remove @bathroom_shelf and describe the counter directly. The prompt is easier to control when every @name refers to an image you actually selected or saved.
Scene 3: animate a reviewed still
Pick the stronger still as your video start image. Select Kling v3 Standard, Image to Video, and use a named reference only if the shot needs an additional anchor. For example, you could mention the saved @amber_hero to emphasize the product while the start image supplies the full bathroom composition.
The camera makes a slow, steady push toward the amber bottle. A soft band of morning light shifts across the glass; the bottle stays upright and still. Use
@amber_heroas the product reference. Keep the motion subtle and the framing calm.
Review the clip against the chosen still and the product photo. The video prompt asks for a camera move and a light change; it does not ask the model to invent a new scene mid-shot. That restraint usually makes the creative intent clearer and gives you fewer variables to troubleshoot.
A quick quality check before you reuse a reference
Named references help you organize instructions, but a repeatable campaign still needs a human check. Use this short pass before saving a generated image or approving a clip:
- Identity: Compare silhouette, proportions, colors, cap, logo area, or facial features with the source. Mark any detail that would confuse a customer.
- Role separation: Ask whether each source contributed what you intended. Did the style image change the product's color? Did the setting reference introduce an unwanted prop?
- Composition: Check crop, negative space, horizon, and hand placement. A composition that works as a square card may fail as a vertical video start frame.
- Text and fine detail: Read visible labels and inspect small edges at the intended display size. Treat generated lettering as something to verify or replace in post-production when exact wording matters.
- Motion: For video, watch the entire clip. Look for drifting geometry, flicker, odd shadows, or a camera move that contradicts the opening frame.
If a result fails, change one thing at a time. Swap a muddy reference for a cleaner one, clarify a reference's job, or simplify the camera direction. Keeping the reference name stable while changing one instruction makes it easier to see which change helped.
Frequently Asked Questions
What is a named reference image in AI generation?
It is an image assigned a usable name so your prompt can refer to it directly, usually with a token such as @amber_bottle. The name helps the model workflow connect your text to the selected image and helps you keep multiple source roles clear. It does not guarantee an exact copy of the source.
Can I use one named reference for both images and video?
In Oxava, a saved reference can be used in Image Composer and in supported video workflows when you mention its @name. For named video references, use Kling v3 Standard in Image to Video and choose a start image first. Model support and reference limits vary, so check the selected workflow before planning the shot.
Do I need to attach a saved reference again in a later session?
No. A saved gallery image lives in your account's reference library and can be called by its name in a later supported prompt. A locally attached reference, by contrast, belongs to the current Composer setup unless you save a successful image to the library.
Why is my @name using the wrong image?
Check for a name collision. A local Composer reference with the same name takes priority over a saved library reference, including when the capitalization differs. Rename one image, then confirm the prompt mentions the intended name.
Will a named reference keep logos and packaging text exact?
Do not rely on it for exact lettering or every small design detail. References guide generation, but outputs can reinterpret text, edges, and proportions. Compare the result against the original asset and use a controlled editing step or final design overlay when precise branding is required.
Make your next reference worth reusing
The useful habit is simple: give each source image a clear role, call it by name, inspect the output, and save only the version you would trust as the next visual anchor. That is how to use named reference images in AI without relying on a vague “use the same one” instruction across an image and video workflow.
Open the Oxava studio, name one clear product or character image, and build a second scene with an explicit @name prompt. When the result is right, save it for the next shot.
Oxava Team
Egemen Küpçü is the founder of Oxava, with 10+ years of hands-on experience in 3D and visual production. He writes about the craft of generating product, brand and campaign visuals with AI.
Related Articles
ALL POSTS
Subscribe to our newsletter
Be the first to hear about new techniques, model updates and ideas on AI generation.