
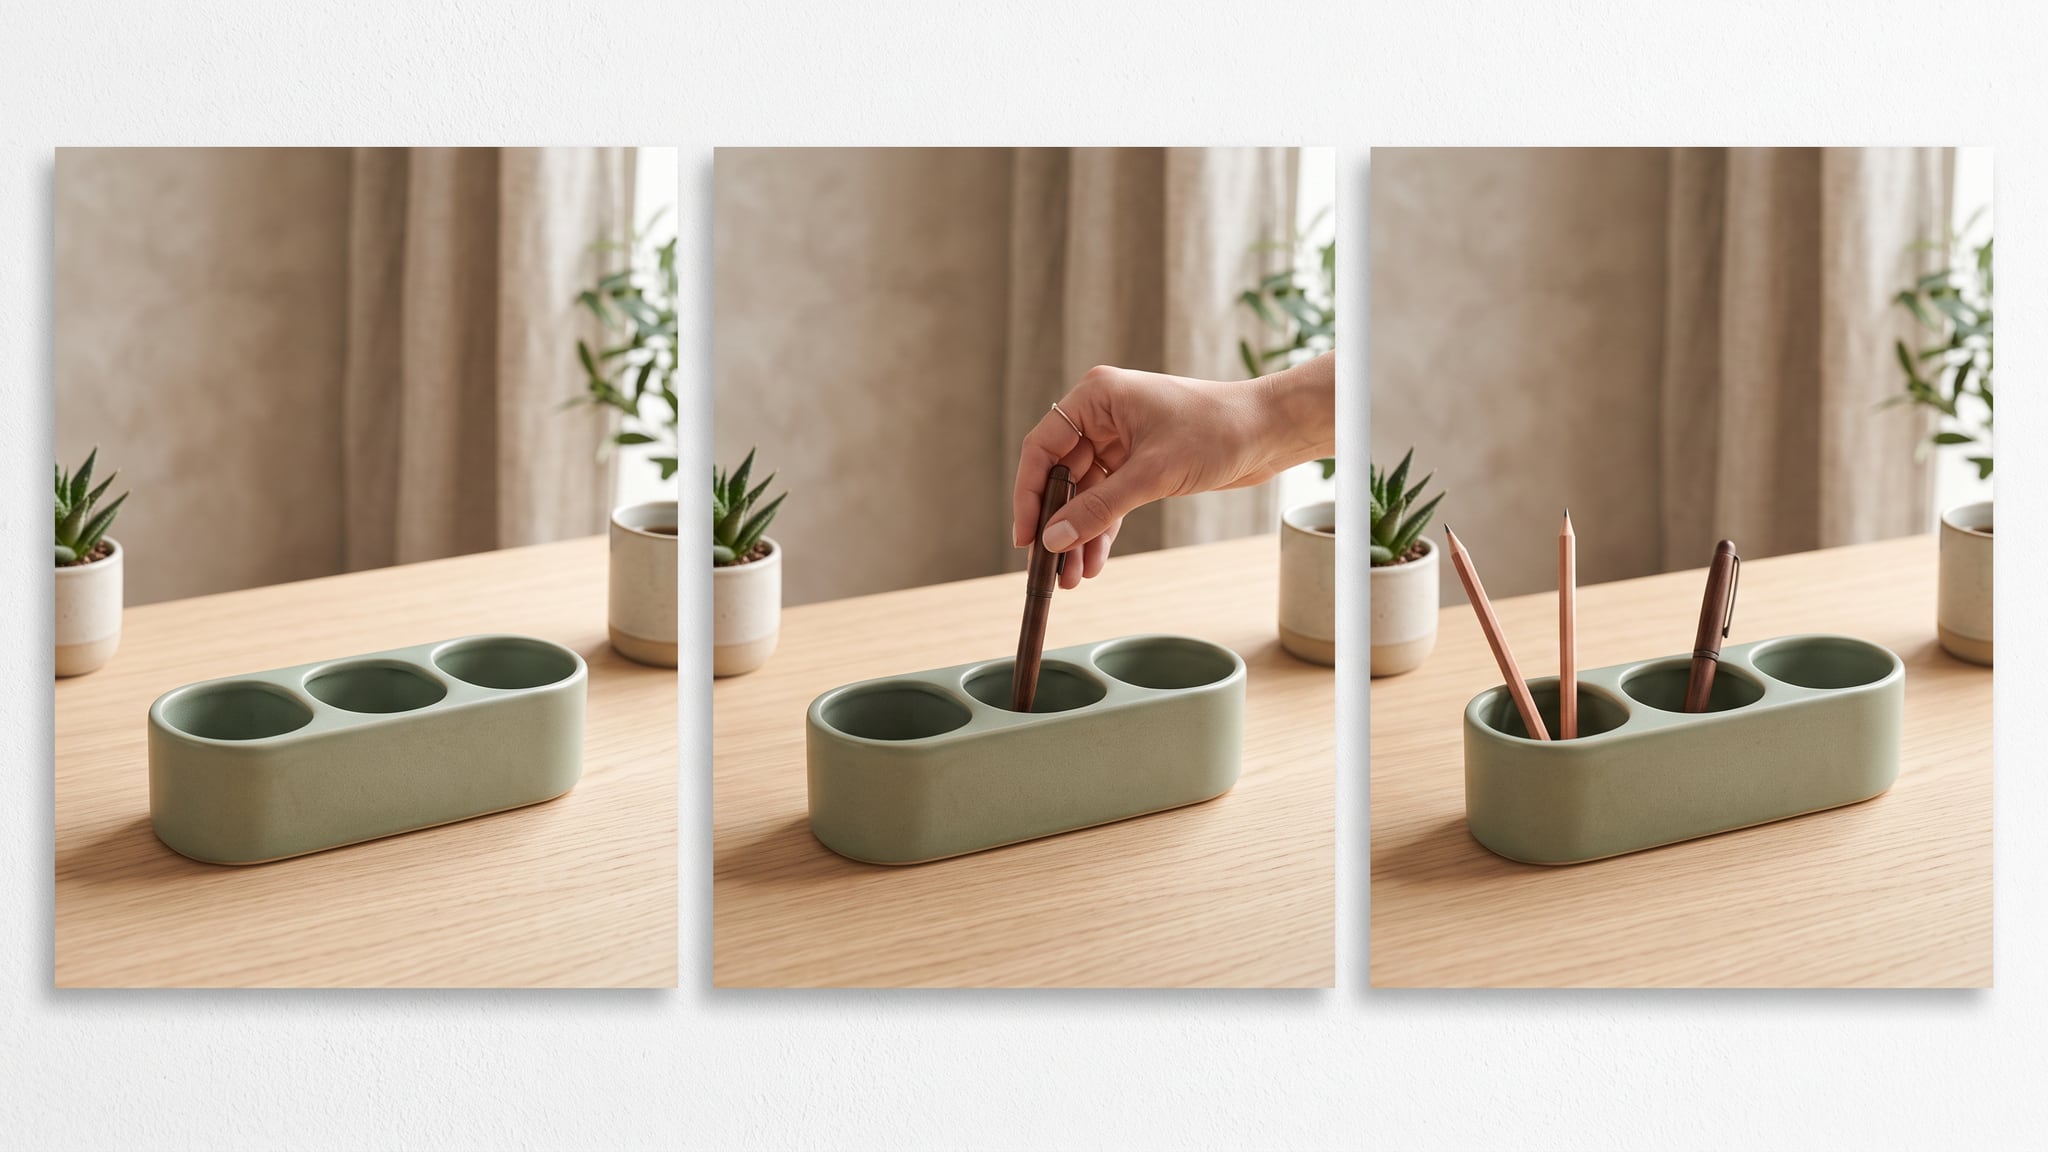
A silent product demo video should let a shopper see what an object does and how to use it. A rotating product on a beautiful desk may establish its appearance, yet leave the important question unanswered: what happens when someone actually uses it?
Start with one visible action, give that action enough screen time, and preserve the result long enough to understand. A 15-second edit can be a useful constraint for a simple home product. It cannot accommodate every assembly step, specification, or instruction.
This guide builds a three-shot plan around a fictional, unbranded sage-green desk organizer with three open compartments. The intended lesson is modest: separate everyday stationery into the compartments. The middle shot uses real action footage; AI-generated context is an optional candidate for the surrounding shots, subject to review.
The organizer, storyboard, comparisons, and calculations below are hypothetical and untested. The cover is an AI-generated editorial illustration, not an executed demonstration or a product-accuracy test.
For a promotional sequence built around atmosphere and an end-card message, see our product video ad storyboard. Here, each shot must help explain use without narration or text overlays.
Define the one thing the viewer should understand
Write the lesson as a sentence before choosing a model or camera movement: “A hand places one pen and two pencils into separate sections of this tray.” That gives the editor an observable action and a bounded result.
“Makes work effortless” offers no equivalent filming instruction. “Stores everything” introduces a capacity claim the proposed footage cannot establish. Even a simple organizer needs a specific promise.
Record three answers in your production note:
- Starting state: the empty tray and the three loose objects are visible.
- Action: a hand places those same objects into the compartments.
- Result: each object remains visible in its intended section.
Keep color, materials, compartment count, and proportions tied to verified references for the real SKU. Our fictional example supplies no evidence about a commercial product's dimensions or performance.
Treat “no presenter,” “no narration,” and “no screen text” as separate choices. A hands-only demonstration can satisfy the first two. If your brief excludes hands as well, choose a truthful appearance sequence or another filming approach; do not make a manually operated product appear automatic.
Choose which shots need real footage
Use this decision tree for every proposed shot:
- Does it show contact, fit, assembly, closure, or operation? Capture the real action. A verified 3D sequence is another option when its geometry and depicted behavior have been checked against the actual item.
- Does it show appearance or setting only? A real still, restrained camera move, or reviewed AI context may be suitable.
- Does the viewer need an exact specification or warning? Keep that information in the product information and instructions. Reconsider the brief if the clip cannot explain the essential point visually.
- Is the necessary reference missing? Obtain it or narrow the shot. Do not fill the gap with plausible motion.
For the organizer, filming actual placement makes the path of the hand and objects inspectable. Generating a convincing hand does not establish that the shown object fits that compartment. The same distinction matters more for a storage-container latch, a removable shelf, or a charging connector.
An AI scene can help explore a desk setting or a stable appearance shot. It can also redraw the tray or add stationery. Accept it only after comparing it with the actual product and the neighboring real footage. If preserving the product requires an external composite, retain the verified product imagery and review the completed composite too.
Our lamp and electronics video accuracy guide covers supported controls and responses in more detail. For this demo, the additional question is whether the finished sequence teaches the intended use clearly.
Build a silent product demo video in three shots
The following untested storyboard allocates 3 + 8 + 4 = 15 seconds in the final edit. These times are planning choices, not measured completion times for sorting stationery or guaranteed generation durations.
| Final edit | Viewer question | Planned source | Visible action | Reject or revise if… |
|---|---|---|---|---|
| 0–3 seconds | What is this, and what goes into it? | Real still or reviewed appearance clip matching the actual set | Empty three-compartment tray beside one pen and two pencils | The tray is cropped, partitions are unclear, or the object inventory differs from shot 2 |
| 3–11 seconds | How are the objects placed? | Continuous real footage of the exact tray | One hand places the pen and pencils into separate sections | Contact is hidden, an object jumps position, or the action needs unnatural speed |
| 11–15 seconds | What is the completed arrangement? | Real ending footage or a verified still from that ending | Hand withdraws; the same three objects remain in the tray | The hand obscures the result or the ending differs from the preceding action |
Keep the camera on a compatible side of the desk throughout. Choose a height that reveals the partitions and the hand's contact with the objects. An overhead view may help with compartment separation; a low angle may hide it. Check the actual tray before committing to either.
Adobe's shot-list guidance recommends recording framing, camera angle, movement, scene action, and audio notes so the editor has the necessary coverage. Add the viewer's question and rejection condition to that production record. They explain why each shot exists.
Capture extra footage before and after the real action so you can trim cleanly. If placing three objects comfortably takes longer than eight seconds, simplify the action or lengthen the demo. Speeding it up until the hand becomes unreadable defeats the lesson.
Compare these hypothetical treatments before spending time on production:
| Treatment | What it communicates | Editorial decision |
|---|---|---|
| A cinematic orbit around an already filled tray | Shape and styling | Useful appearance footage; insufficient to show placement |
| Empty tray cuts to filled tray while objects appear without contact | Two states with an unexplained transition | Revise when the goal is teaching the action |
| Continuous real placement followed by a stable result | The visible path from loose objects to separated compartments | Candidate for product and comprehension review |
These are planning comparisons, not observations from generated clips. A continuous real take still needs review for framing, truth, and clarity.
Prepare references and assemble the sequence
Create a reference packet containing the SKU, approved photos, real action source, intended lesson, and unchanged details. Include a frame showing the empty tray and a frame showing the genuine final arrangement. Record who supplied the source material and its permitted use.
Use Oxava to explore a setting or appearance candidate when that is useful. Keep those candidates separate from the real action footage. Product identity and shot continuity need human review; this workflow does not assume automatic product locking or quality approval.
Runway's image-to-video prompting guide distinguishes the image's appearance information from the text's motion instructions. It also advises starting simply and checking source artifacts. That is guidance for its own models, not a guarantee that another generator will preserve an item.
For a surrounding appearance shot, request one restrained movement and inspect the entire result. A slight push toward a stationary tray is easier to review than a move that reveals unseen surfaces while objects move independently. Obtain the missing reference before showing an unsupported angle.
Our cinematic video prompting guide explains camera language; the product-photo-to-video workflow covers preparing an existing still for motion. Keep those appearance decisions separate from the filmed placement.
Assemble the selected sources in an external editor. Match the framing, lighting, and object positions across cuts. A held real still may serve the first or last shot perfectly well; every second does not need generated motion.
Remove the audio track for the silent delivery, then inspect the exported file. Muting an editor preview or a storefront player does not prove the file contains no audio. Keep the final silent version distinct from any separately described version.
Review product truth and comprehension separately
First apply a product-truth gate. Use the actual references beside the complete clip:
- Confirm the same tray, three compartments, proportions, and finish throughout.
- Track the pen and two pencils individually through every cut.
- Check contact, occlusion, and release during each placement.
- Reject extra objects, changing partitions, and unsupported movement.
- Confirm the ending follows from the visible action.
- Check that cropping or a loop does not conceal an important step.
Then apply a separate comprehension gate. The following is a proposed review, not a test we performed. Show the silent edit to someone unfamiliar with the brief and ask what the product is, what the hand did, and what changed. Ask them to identify the moment supporting each answer.
Record their words before explaining the intended message. “The tray sorts things itself” identifies a different problem from “I could not see where the pen went.” The first may indicate a misleading cut; the second may require a clearer angle or a longer action shot.
Choose your release criteria before this review. For example, require that reviewers can describe placement and the resulting separation without inferring automatic operation. This is a suggested working criterion, not a validated score or an industry benchmark. A few informal responses cannot establish universal understanding or conversion performance.
Use specific rejection reasons to decide the next action:
| Failure | Likely production issue to inspect | Next step |
|---|---|---|
| An object appears inside a compartment without a visible path | Missing coverage or generated motion | Replace the affected interval with clear real action |
| The hand hides the placement | Camera position or blocking | Reframe and capture the action again |
| The ending contains an extra pencil | Source or continuity mismatch | Correct the ending and recheck the inventory |
| Viewers miss the completed arrangement | Result hold is too short or cluttered | Extend or simplify the final view |
| A loop makes objects jump out of the tray | Ending and beginning are incompatible | Use a clear stop or redesign the loop |
Check the encoded file at the size shoppers will see. A partition visible in the editing monitor may disappear in a small product-gallery player. Fix the affected shot before polishing transitions.
Calculate usable seconds and verify delivery
Keep a production worksheet that includes rejected attempts.
| Field | Your entry |
|---|---|
| SKU, brief, and version | Exact item and the lesson this edit must teach |
| Source and attempt | Real capture, still, or generated candidate; unique filename |
| Raw duration | Seconds available before rejection and trimming |
| Accepted interval | Start/end time and seconds retained for this edit |
| Generation expenditure | Credits actually charged across all attempts |
| Production time | Active reference preparation, real capture, and generation handling minutes; log unattended waiting separately |
| Retouch/edit time | Correction, compositing, and assembly minutes |
| QA time | Product, comprehension, and delivery review minutes |
| Rejection reason | Wrong product, unclear action, continuity error, or another specific issue |
| Release record | Owner, encoded filename, destination, and observed result |
Use these calculations:
- Usable generated share = accepted generated seconds ÷ total generated seconds. Count retained timeline intervals once; overlapping alternatives do not add useful coverage.
- Credits per accepted generated second = all generation credits charged ÷ accepted generated seconds. With zero accepted seconds, report “no usable output” rather than dividing by zero.
- Labor minutes per delivered second = (active production + retouch/edit + QA minutes) ÷ final delivered seconds.
For a hypothetical worksheet example, four five-second attempts produce 20 generated seconds. If three seconds pass review and are used for the opening, the retained share is 3 ÷ 20 = 15%. Three approved appearance seconds, eight real action seconds, and four real ending seconds fill this storyboard. If the appearance footage contradicts the real starting state, those seconds are unusable regardless of the arithmetic.
These figures are not observed yield, an Oxava price, or a saving. Keep production, retouch/edit, and QA minutes separate alongside credits. Our approved-image cost guide explains how to include rework and labor in a broader production budget.
Finally, inspect the actual storefront upload. Shopify's product-media documentation explains that video display requires theme support and that uploaded videos are converted and served in delivery formats. Check the live product, chosen variant, framing, playback, and result hold; a successful upload is only one checkpoint.
Supply an equivalent description of the visual sequence with the video. W3C's visual-description guidance addresses descriptive transcripts and audio description for people who cannot adequately see the content. Keep the product information available as text, and provide the appropriate alternative or described version for the intended experience. A silent clip alone does not complete an accessibility review.
Frequently Asked Questions
Can a product demo work without narration or screen text?
Yes, when one visible action communicates the intended lesson clearly. Review the result with people unfamiliar with the brief. If understanding depends on an exact specification or several hidden steps, provide that information separately or choose a different format.
Should AI generate the hand using the product?
For this workflow, film the actual interaction when contact, fit, or operation matters. A realistic generated hand cannot verify the product's behavior. Use AI context only where the completed shot remains accurate against the actual references.
Must I generate all 15 seconds in one pass?
No. The storyboard describes the final edit. You can combine real footage, held stills, and approved appearance clips in an external editor, then trim the sequence to its planned duration.
How do I know the silent demo is clear?
Review product truth first, then ask unfamiliar viewers to describe the item, action, and result without explanation. Record confusion and the frames involved. This proposed review helps improve the edit; it does not establish a measured sales benefit.
Is a textless demo ready for every country?
No universal conclusion follows from removing text. Review the actual market, product information, usage conventions, and accessibility alternatives. A visually clear sequence still needs an appropriate page, source permissions, and destination checks.
Make the visible action carry the explanation
A useful silent product demo video connects a recognizable starting state to a clear action and a stable result. Keep the demonstration grounded in the real product, review understanding separately from appearance, and count only footage that survives both checks.
Open Oxava to prepare bounded appearance or context candidates. Combine approved material with real action footage in your editor, then verify the delivered sequence where shoppers will watch it.
Oxava Team
Egemen Küpçü is the founder of Oxava, with 10+ years of hands-on experience in 3D and visual production. He writes about the craft of generating product, brand and campaign visuals with AI.
Related Articles
ALL POSTS

Subscribe to our newsletter
Be the first to hear about new techniques, model updates and ideas on AI generation.